
Before create a new database check if the installed PostgreSQL version has the postgis extension intalled. For more information go to Appendix A, Checking postgis extension.
After installation of the TerraAmazon click on the shortcut icon created on the windows desktop.
An Welcome window will show up.
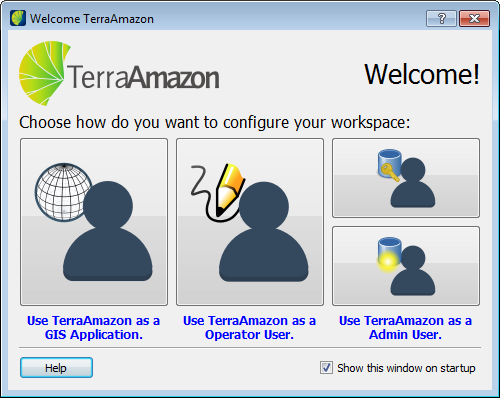
Click on the picture to configure a new project.
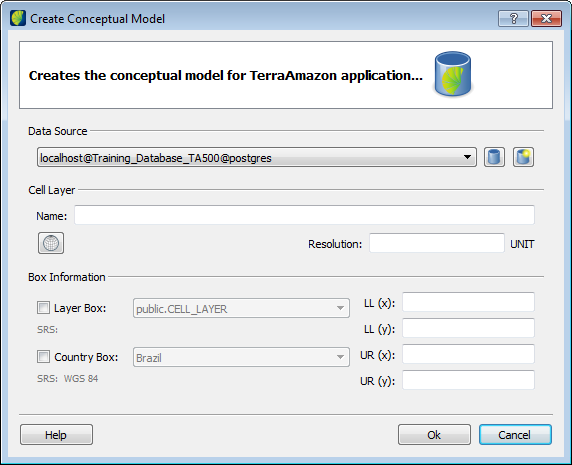
Access the interface by clicking on the menu ADMINISTRATION → CREATE CONCEPTUAL MODEL.
Click on the icon
![]() to create a new data source, as
shown in the following figure.
to create a new data source, as
shown in the following figure.
Database Type: select which DBMS will be used to create the database. It is suggested to use the free DBMS PostgreSQL with its spatial extension PostGIS. This manual was developed using PostgreSQL/PostGIS. TerraAmazon is not related to PostgreSQL.
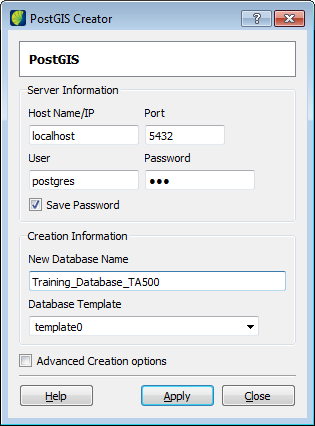
Host Name/IP: inform the IP address or the name of the server where the DBMS is installed. If the server is the local computer, type in localhost or leave the field empty.
Note: On Microsoft Windows® OS, there are different ways of finding out the IP address. If working directly on the computer in which the DBMS is installed, just open the Command Prompt and type ipconfig and search for the IPV4 address. If working on a corporate environment, check with someone responsible for the network to inform you.
Port: inform the DBMS connection port, the one defined during its installation. If there is only one port defined for the DBMS, it is possible to leave this field empty. When using PostgreSQL/PostGIS, you can verify the port number by opening the file postgresql.conf and searching for the word “port”. This must be done directly on the server where PostgreSQL is installed.
User and Password: when creating a new database, these fields refer to the Administrator user of the DBMS. This user is created during the DBMS installation. This should be clear to the TerraAmazon Administrator: the user required when creating a new database is NOT a TerraAmazon user, but the DBMS Administrator user. In this manual, such user´s name is postgres. TerraAmazon users exist only after creating the database and the conceptual model.
New Database Name: provide a name for the database. Do not to use accents, empty spaces or special characters of any kind.
Database Template: initially select Template0.
Additional database parameters can be included checking Advanced Creation Option box.
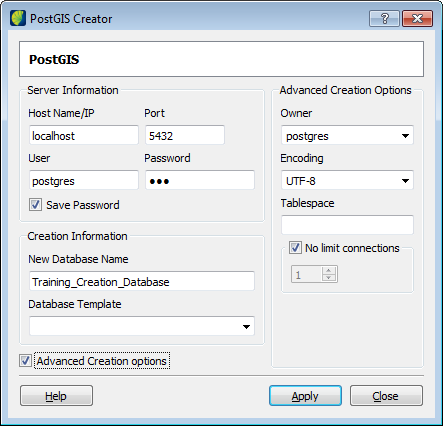
Owner: select the user to own the database.
Encoding: the client encoding is what allows TerraAmazon to display correctly the text information stored in your data. Different languages may have different characters and each one has one or more client encodings that display them correctly. If your data has different characters, find out which encoding is the best for that group of characters. It is necessary to keep the compatibility with the encoding defined for the DBMS. Encoding types are not related with TerraAmazon.
Click on the Apply button to create the database. After creating the database, TerraAmazon will automatically connect to it. If the encoding is not compatible with the DBMS system, use UTF8. Also, if no encoding is selected, UTF8 will be automatically used.
Note: If creation failed an alternative to create a new database is described in Installation - Creating a new Database.